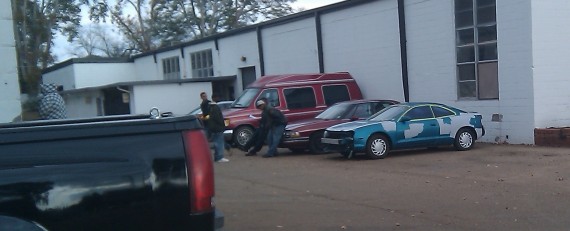
What a load-of…

July 30, 2011

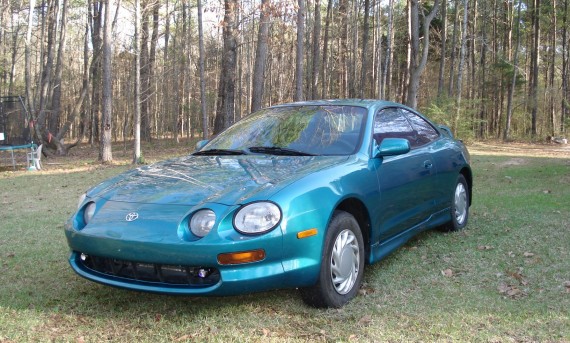
Finally!  After about 6 months of wanting to swap out the suspension, it’s finally done.

Okay, so about four of those months were spent just waiting on back-ordered parts and two months of it were just waiting for a free weekend.  Back while it was still in the shop to be painted, I a met a very generous guy, Morgan Thompson, who’s a wiz with import cars.  He offered to help me change out the suspension.  It’s not a complicated task, but having the right tools and an extra helping hand makes it much more tolerable. So, I helped him. 🙂

The old suspension was the original 17 year old suspension, and I have known for several years that it was time to change.  The rear would bounce, clunk and rattle.  When we were removing the shaft nut from the right rear struts the shaft just fell down inside the casing–no resistance at all.  It was the worst blown strut Morgan had ever seen.  The fronts weren’t all that bad, but certainly time to replace them.  The fronts were interesting: they’re “rebuildable” which I thought normally means that you can replace the dampener (often called a “shock absorber”) inside of the larger casing.  What I ordered was just that sort of thing.  But when we opened the casing on the original strut it was pressurized a bit and full of oil and a piston/inner-casing mechanism as well.  We surmise that it’s an insert too that just recycles that oil.  Nonetheless, we cleaned that all out and put in the new inserts.  We also replaced some of the bushings and all of the rubber that the springs come into contact with, although the originals were still in pretty good shape.

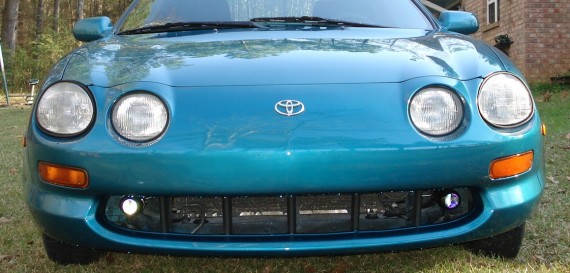
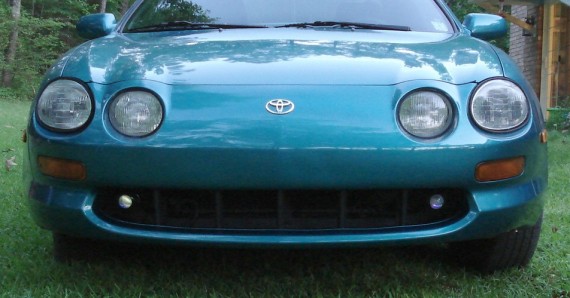
When I got the new wheels and tires, the difference was night and day.  Now that I’ve changed out the suspensive it’s, uhh, day and Christmas Day?.  Well, at least it doesn’t sound like I’m carrying around a load of bricks in the trunk anymore while going down the road.
0

Woo-hoo!

April 19, 2011

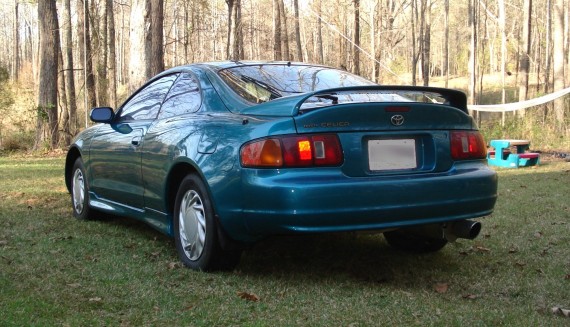
Yay!  My new wheels and tires arrived today (new to me, at least). I was trying to go for this look.  I searched and searched for what’s actually in that picture, but they’d been discontinued.

I got these used ones from a nice guy in Sunnyvale, CA for a pretty good price considering that it included four essentially new tires.  New tires would cost nearly the same price.  My original ones were hubcaps and bald tires (man did those roar going down the road).  I’d been neglecting to change the tires for a while since I knew I was planning to do all this renovation eventually.

I had a hard time finding lug nuts that would work: they sit a little deep inside the middle and then a cap has to cover them.  The first ones I found were about 1mm too tall and the center cap couldn’t sit down all the way.  I finally found what I needed and was robbed by Napa Auto Parts for $2.50 per lug for a simple tapered nut.

Pictures soon..

0

I’d Like the Blackened Scoop Please

April 12, 2011

Friday I used some high-temperature flat black spray paint (bought at Home Depot) to spray all the stuff in the air scoop back to black again.  Over time it had “gray-ed” and chipped which you can see in some of the previous pictures.

At Amazon one reviewer says that a small spill of brake fluid cut through it.  So there may be better paints for the job.  I’ll post back if there is any issues like that with it given the application.  Also, it’s not as black as black can be.

But anyway, here’s what I did:

  1. Pull off the 5 black “caps” that wrap around the vertical supports in the air scoop.
  2. Use a soft bristle brush to get as much of the junk and dead bugs out of the A/C coils.
  3. Use a $1 plastic drop cloth to wrap the front bumper in plastic taping it in a few spots to the body with blue masking tape.
  4. Cut a slit in the plastic across the scoop.
  5. Use masking tape also to tape the flaps (from cutting the slit) to the inside of the air scoop to cover the bumper that wraps inside of the air scoop.
  6. Mask the 5 vertical scoop supports (if you care).
  7. Continue masking just inside of the scoop any part that you don’t want to get paint on it.
  8. The paint can said to paint the parts while warm.  So, run the car at idle with the A/C on for a few minutes.  It doesn’t get very warm, but it’s better than nothing.  Leaving in the sun initially may help some too.
  9. Spray a light coat of paint.
  10. Wait 20-30 minutes until dry to the touch.
  11. Spray another coat.
  12. Wait 20-30 minutes again.
  13. Unmask and cleanup.

Before Scoop Painting


After Scoop Painting

0

Lull

March 23, 2011

So there’s a lull in activity.  I’ve done some more cleanup (pictures to come) and minor repairs (battery replacement, bulb replacements, wired up the fog lights, etc).  I’m waiting on some back-ordered parts to come in.  When they do, I’ll be changing out most of the replaceable suspension parts (some of the bushings, struts, insulators, etc).  Hopefully the ride quality will be like-new again.

I’m also planning to order these Sacchi Rims which are as close to the now-discontinued Ace Manta rims as I could find.  And I plan to re-paint the inside of the air-scoop in the front back to flat black again.

0

Welcome Home

March 12, 2011

This past Monday (4 1/2 months later) I got the car home for good.  It’s shiny again.

I’ve still got some work to do (waxing, interior, new tires/wheels, new suspension, etc), but here are some pictures.


Notice the side skirts and the new fog lights.

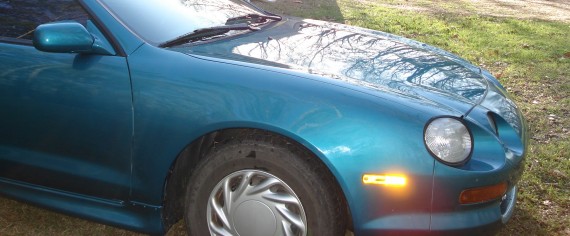
The hood has a shine again!

No more dents in the rear driver-side fender as before.

The bad: Okay… These pictures are at flattering angles.  Up close, things aren’t perfect.  At the beginning I knew that I’d get what I paid for (which was $0 labor).  So what’s flawed?

  • Side Skirts: The side skirts were not installed correctly.  It shows along the runner below the door.  They used glue and the factory clips to hold the side skirt on.  Why glue? I don’t know.  It mostly caused a mess.  The factory didn’t use glue; the clips sufficed.  From what I can guess, the holes for the clips were drilled too big and the clips wouldn’t hold.  Secondly, when it was put into the paint booth (where they increase the temperature to 110 degrees +), the side skirts began to pull away from the body and the glue seam was then visible.  To remedy most of the problem we put small screws along the top of each side-skirt which look a little like rivets.  It looks kinda cool.  But if I had it to do over again: I would insist that the car and side skirt be painted separately.  And then install the side skirts properly using only the clips.  This allows the body and side skirts to flex slightly as necessary.  It remains to be seen if the solution we used works out in that respect.
  • Runs: The color looks great.  But there are a few runs in the clear coat around the body seams.  They’re not noticeable until you get pretty close and we polished them out for the most part.
  • Orange Peel: There is some orange peel in the clear coat (a surface quality that looks a little like a an orange peel) in a couple of places on the roof.  I think the problem was that the painter could not really get high enough over the surface.  It’s not really that bad, and I think it may be able to be buffed out.

While not perfect, all in all, it’s a 900% better.  Thanks goes out to Spince at the school.


0

Painted!

February 24, 2011

A couple of weeks ago, I decided to let me veritable pot’o’water sit on the stove a bit longer before I watched it again.  Well, today I went by to check on things and low and behold…

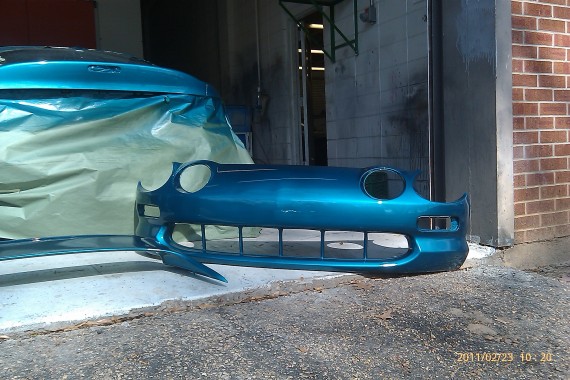
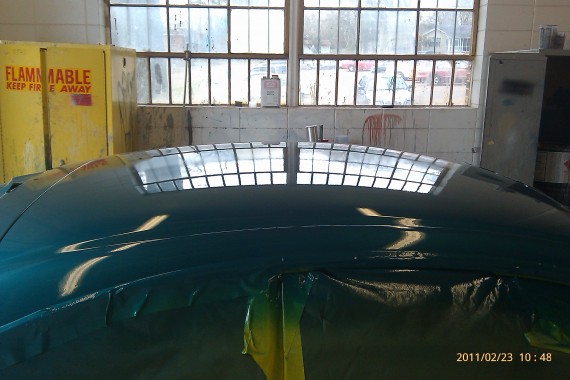
Huzzah!  It’s painted–clearcoat and all. 3 color coats plus 1 extra color coat on hood and roof.

Painted 1

Painted 2

As you can see it’s shiny shiny. When I arrived he was sanding out some runs in the clear coat.  There’s a little bit of orange peel here and there, but it should polish/buff out (so I’m told).  And the side-skirts aren’t hugging the body in all the best ways despite being clipped, glued and screwed.  So, we’re going to get creative in making them conform to their new master.  But overall, it’s definitely already an improvement over its former state.

Painted 3 (some orange peel on roof)

I’m planning to take all the removed parts by either on Friday or early next week and assist in reassembling everything.  I took everything off and want to ensure that all the screws go back in all the right places 🙂

0

On The Role Again

January 28, 2011

It has been a while since I’ve posted, but here’s a quick update.

I got the car back to the votech, and things are rolling again.  The OEM side skirts have been fitted.  So, that’s progress.  There shouldn’t be anything after that except to mask it off (again) and move it into the paint booth.

Concerning the headlight that got broken: I managed to boil it apart (that makes 5 that I’ve done now) and repair the internal damage.   The only thing I wasn’t able to do (yet) was repair the broken bolt bracket.  There’s a small shard of plastic missing that I need in order to glue it back on.  It’s on the garage floor somewhere.  But even if I can’t find it, I may be able to manufacture a strip of metal to perform that role.  Either that, or the two remaining bolts plus the anchor stud would probably be sufficient to hold things in place.

While I was at it, I finally reassembled the other low-beam and the high-beam from their repair.  The time consuming part is getting the old glue out.  I managed to do it using a small butane torch (to warm it) and a screw driver to scrape it out.  The used a razor knife on the glass side of things and scrubbed it down with some lacquerer thinner  to remove the remaining film.  It wasn’t 100% cleaned out and off, but I think it’s sufficient.  Also, where the plastic had started to deteriorate/dry-rot around some edges, I torched it.  And I think it sort’a reconstituted the plastic a bit.  At least it seems stronger and not as brittle anymore in those places.

I used 3M’s windshield “glue” to reassemble the lenses to the fixture.  It says it’ll never harden.. which it hasn’t so far.  It’s still a little gooey even 5 days later, but I think it’ll make a strong enough seal.  Besides, it’s there to keep water out (which it’ll do well), and it still has those metal clips to hold it on.  I still need to re-glue the black rubber gaskets on the low-beams, but that shouldn’t be a difficult task–the clips tell you where they have to be positioned.

I also ordered some new projector fog lights.  The other ones were probably 12 years old and had started to become yellow in the lenses due to dirt.  I wouldn’t be about to get them apart without breaking them open anyway.

Another thing I had to do was reassemble the interior around the steering wheel.  Some students from the electrical mechanics class were assigned to try and diagnose the starting problem I mentioned above, but they were obviously quite clueless about things (diagnosing problems with the starter that obvious worked fine when you tried to start it).  But fortunately, I’d disassembled/reassembled that area a few times before.  So, I knew were all the screws and parts scattered around on the floor went.  While I was at it I started the cleanup of the interior–at least in that area.  It’s cleaning up nicely.

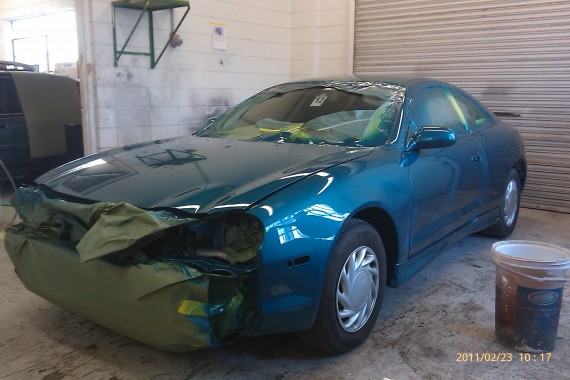
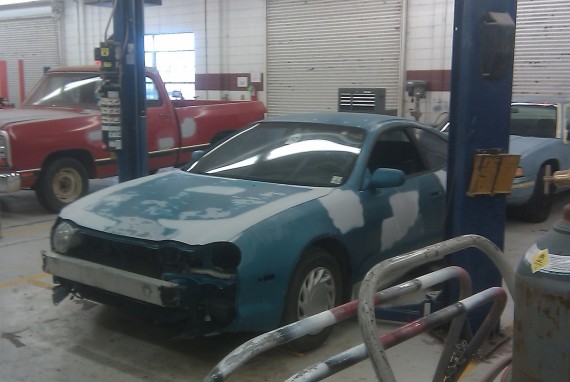
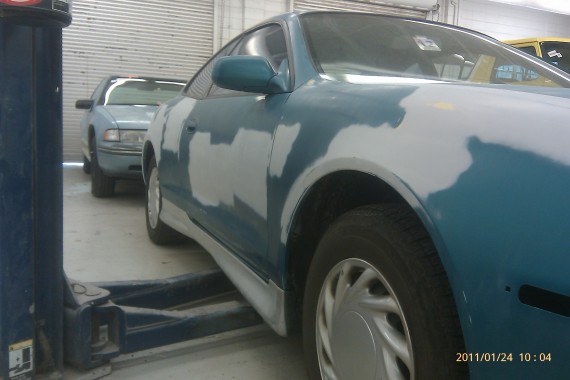
Here’s a couple of pictures of it back in the shop from this past Monday.  The second shows a side-skirt. It’s just a dry fit at the moment.  They were about to raise it on the lift to drill the holes for the bottom.

Back at Votech

Side Skirt Dry Fit

0

ACK!

January 8, 2011

This past Thursday I received my car back from my mechanic.  The coil in the distributor had gone out on it.  I don’t think this could have been caused by the guys at the votec.  It was most likely due just to age, or it could have been helped along to destruction because of an engine washing I did a few months ago.  I’ll be more careful next time.  After the expensive of towing and parts, it wasn’t the cheapest fix I’ve ever had, but I’m glad it’s running again.  I drove it back home and will return it to the college on Monday where they have said it’ll be promptly painted.

On a frustrating note: All of the parts that are removed from the car have been sitting in the garage over in an out-of-the-way pile for the last few months.  No one had ever bothered it before.  However, on the same day that I got the car back home, my 3 year old decided to play with the passenger side low-beam headlight fixture.  Mom said to put it down and she threw it!  SMASH.    Well, the glass didn’t break, but the insides are rattling around and loose.  And, one of the ears with the bolt holes is now broken off.  UGH! And this was one of the fixtures that was in perfect shape needing no work.

So, I’m on a search for a replacement for that.  They’re on Ebay, but a bit overpriced.  I’m checking local junkyards first.  Oddly, the Pull-A-Part here had a 1995 in December, but the website says it’s not there anymore.  I can’t remember if it had the passenger side headlight in tact or not, but I at least wanted to check.

0

Official Hiccups

December 18, 2010

Well, there’s officially a hiccup in the whole process now…

As I previously wrote: the body shop votec said that the engine would turn over but would not fire when they went to move it into the paint booth.  They were going to take it next door to the votec department that teaches engine repair and such.  At the time it sounded fine to me.  Well, last week I went to check in on how things were going… and they weren’t.

When I got there I found the instructor very disinterested in the project.  He put “some guys on it.”  Well, next thing I know, they still have no idea what’s wrong with it, and I’m down one installed alarm system (which I (who installed the alarm myself right after high school) could have told them has NOTHING to do with the firing of the engine).  Then he says that they’re in the middle of finals and wouldn’t be able to get back on it until after the Christmas break on January 10th.  “When after that might it be fixed? A week?  A month?” I ask in an air of obviousness.  “Well, I can’t make any guarantees.  We can make a class project out of it though.”

On my way out I snapped a quick shot on my cell phone:

At the car repair votec.

I’m not so concerned with it taking so long.  It’s just the thought of fifteen guys poking and pulling at critical things?  “Now, where does this thing go?” …BANG BANG BANG… “Got’it out boss.”  Nawp… no thanks.  I’ll figure something else out.

After some mulling it over, I decided to have it towed to my regular mechanic, have him fix it, and then drive it back to the votec for BODY WORK ONLY.

Early this week, I took the day off to run some Christmas errands and to get this taken care of.  They moved the car back to the body shop area.  I called a tow truck…  <waiting> <waiting>

Hmm. I’ll just go peek and see what the students did to it… Tsk-tsk. Typical.  The dash under the steering wheel is disassembled all over the floor with screws and clips scattered around.  Fortunately, I’ve dissembled/reassembled that area several times, so I know how it goes back.  I can only hope that all the parts are still present.

<waiting> <waiting> Ah, here he is.  Oh, good. It’s the flatbed kind.  We pulled around back of the votec.  No one is around; everyone is gone for the Christmas break.  I think this tow truck guy is either trying to impress me (the only one around) or else is just lazy–perhaps both.  He pulls up perpendicular to my car… like he’s the vertical part of an ‘L’ and my car is the horizontal part.. except there’s about 25 feet between the two. (“L” for “Lazy”, I maintain… read on)

“Do you want me to help push it into position?” I ask.

“Nah.. I got it”.

Ok, maybe he feels the need to earn his $75… No wait. He’s not going to exercise a muscle save the typical excursion it takes to walk from here to there.  He connects the wench hooks to the tow brackets. Then he cuts the steering wheel all the way to one direction.  Then with the winch he proceeds to drag the car into position and onto the bed.  Impressive?  Sure (were it actually necessary)  Graceful?  Not really.  Nonetheless, we’re on our way to the mechanic.

I get to the mechanic and explain the situation–mainly to inform him why the car he normally works on is only present in part.  I told him there was no rush as school would not be back in session until January10th.  I depart.

I heard from the body shop instructor that they’ll paint it first thing when school resumed.   Well, I do hope so.

Yeah, I know.  I’ve been saying/thinking all along that ‘you get what you pay for.’  Hopefully, what I get is just a long process and not a poor result. While the latter is a possibility, it shouldn’t be worse than when I started.

0

Not Yet

December 7, 2010

Well, I went by to check up on things last Friday, and nope, still not in the paint booth.  They said it wouldn’t start–just turns over, but won’t fire.  Fortunately, they have a mechanics division of the votec.  So it was supposed to go over there yesterday to fix that problem.

I also delivered some OEM side-skirts that I found on the Internet.  I paid a little more than I’d like to have for 6lbs of plastic, but whatever.  They’ll need to be refinished of course, and I guess they’ll have time to wet-sand and prime them while the engine problem is being checked out.  They will have to drill holes in the body to mount them.  I’m hoping the holes will be primed properly to minimize chances of rust later on.

Also while I was there, the instructor asked if I could bring over all the parts that I had purposefully removed my self.. Why?  I know where all the screws and clips go, and wanted to make sure that none were lost and/or left out in the reassembly.  But, I can understand that they guy doing all the work would want the satisfaction of seeing it all pretty and whole once again.. wanting to actually produce a final product (To paraphrase: “And God saw all that He had made and judged it very good..” obviously resonates with us mortals).  So, what I think I’ll do is suggest that when all the painting is finished, I’ll take the day off and come over with the parts and we can reassemble it together.  I hope he’ll go for this.  I really did diagram where things go back on and separated the parts into baggies. 🙂

On another note, I checked again with the Pull-a-Part here in Jackson, and they in fact have recently obtained a ’95.  I shot over there, but only found one part to be of any use–the shocks that hold up the hatch-back.  I replaced mine for the first time a couple of years ago, and they’re already in need of replacement again.  The ones at the junk yard looked original, but worked well.  I pulled those and left.

I also ordered from Amazon some glue to reseal my headlights back together after swapping the lenses on both driver side lights.  I believe this is a compound that you’d use to replace a windshield, but has all the properties that I’d think would be necessary for the headlights (non-hardening, waterproof, etc.)  In this last visit to the votec, I pulled the driver side high-beam to replace its lense too since the reassembly will be done there and not here.  I wouldn’t be able to remove the high-beam fixture without taking the bumper off again.  I’m still procrastinating resealing the lights.

0